|
|
|
|
|
|
|
My Rod Making Process I started documenting the making of the second butt section for a Payne 97 that I started in October 2007. This is how I made this particular rod. I don't always do things exactly the same from rod to rod. The steps involved are pretty general, meaning that all rod makers are doing something similar in function if not in design. I don't include any proprietary information that I've I've learned from other rods makers. Everything I do can be learned through any one of several rod making books, with the exception of steaming. I use steam but most rodmakers don't.
|
|
|
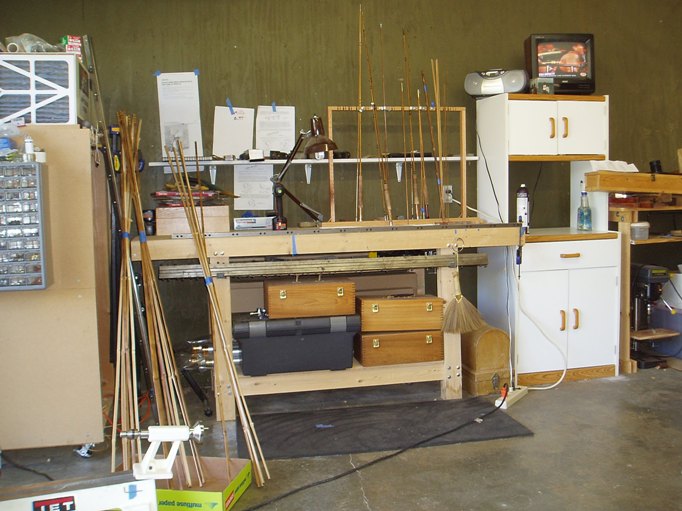
The Shop
This is a picture of where the rod making takes
place- my garage shop. Look around. You'll see some general
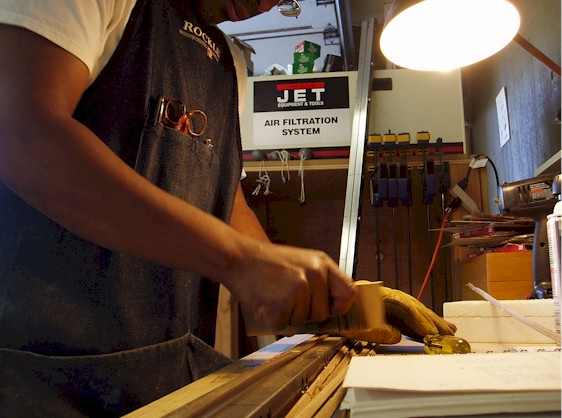
woodworking equipment such as the air filter, lathe, drill press and
if you have a good eye, hand planes. The 3 metal forms are
particular to bamboo rod making. The one hanging on the bench is for
making 4 sided rods. The bamboo leaning on the bench are bound, 6
pieces or splines together and marked depending on the rod they've
been assigned to.
The Taper
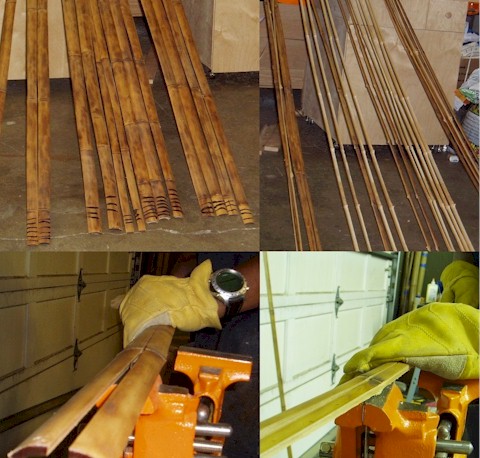
Splitting Once a rod taper is decided on, the cane for the rod has to be selected and split into smaller pieces. The cane that I’m splitting has been flamed with a torch to give it some color and heat treated, or cooked. In this case I’m splitting cane for 2 full 3 piece rods and the butt section for one 2 piece rod. The cane is split into pieces about ¼ of an inch thick. The cane is split in half and then each piece is split in half again until the desired size is reached
Node Work The "rings" on a stick of bamboo are called nodes and these nodes have to be removed both inside and outside before a rod can be made. The inside portion is called the "internodal dam" and I remove them with a belt sander.
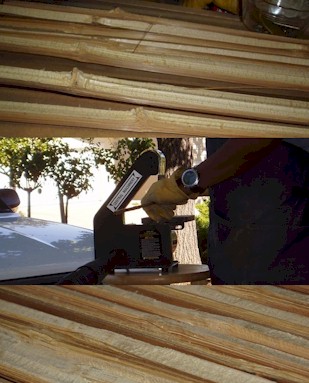
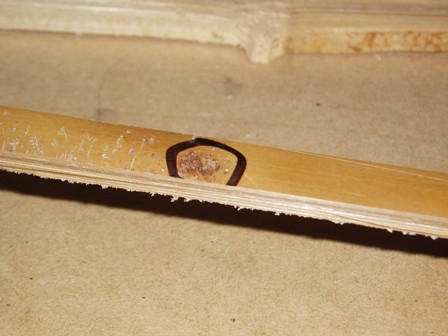
After sanding the nodes dams I check the cane for blemishes. The larger blemishes can be seen and marked before the cane is split. Each spline or strip of cane is checked and the blemishes are marked. Some blemishes are worse than others. Water marks a maker might hid by flaming. Worm holes might not go very deep or can be planned around but cuts or slash marks usually can't be used. I don't know what the mark is in the picture but I'm not going to be able to use this section. Fortunately, in the next step I might discover that I can use the unmarred portion.
Nodes have to be removed both inside and outside. For me, working nodes starts with staggering- offsetting the nodes so that no two nodes are next to each other.
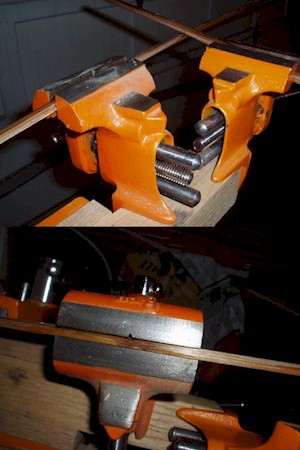
After the nodes are staggered and the cane cut to size, the nodes are pressed in a vice and filed. Using steam, I heat and then press the side of the nodes to remove the kinks and straighten the spline, then I’ll press the top and bottom to flatten the node. The vice has a small notch to accept the nodal ridge. It flattens the node and leaves just the ridge, which I then simply file away. My goal here is to flatten the nodes without filing away too much of the material underneath.
Roughing
The next stage in making a rod is called "roughing".
Roughing is simply taking the cane from the rectangular piece I've been
working with to an untapered 60 degrees spline.
Sharpening
After planing the initial triangle into the strips, I
check the nodes to make sure they're still flat. Sometimes they pop up
and if they do, I work them again under dry heat.
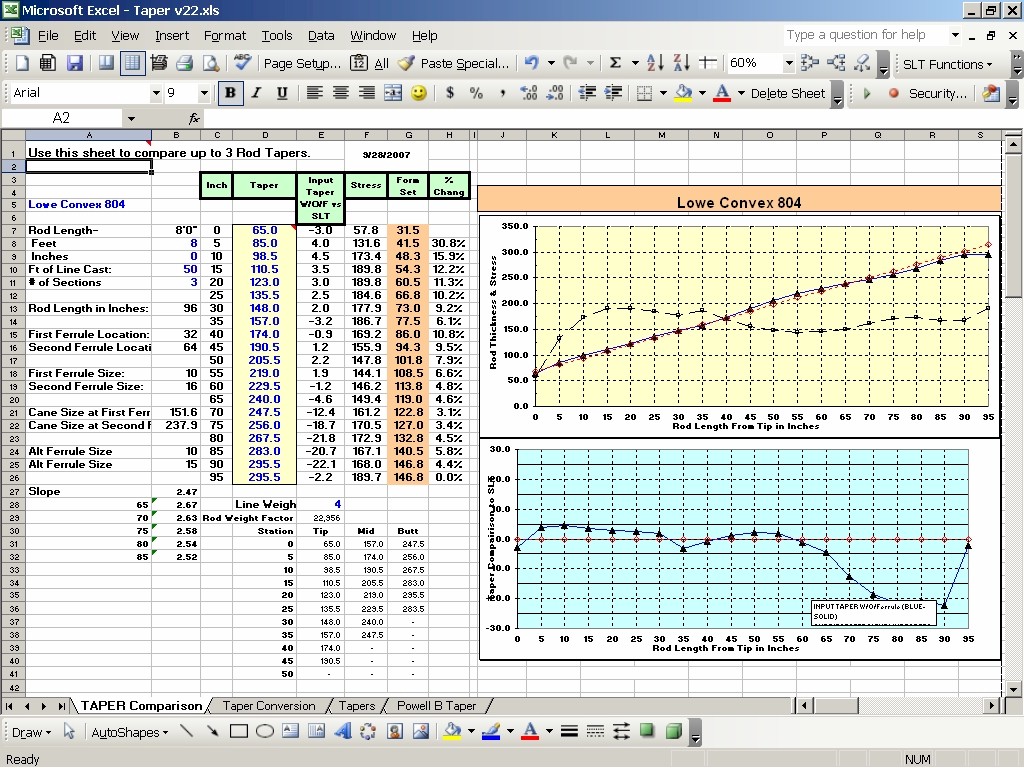
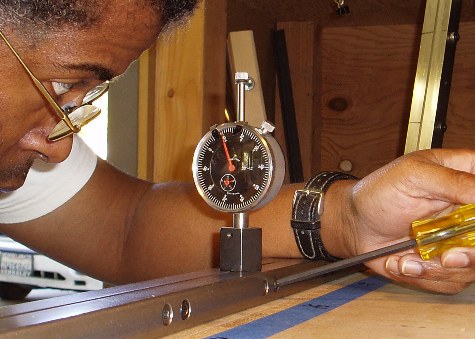
Setting Forms Now it's time to set the planing forms. The forms have a tapered triangular groove running down the center. I adjust the width of the groove based on the taper of the rod I'm making. A taper is taken at 5 inch intervals and so I adjust the width of the groove every 5 inches along the 5 feet long form. Typically forms are set at one half of the taper width. I use a glue that contains walnut flour and produces a thicker glue line than some other glues. To get the proper dimensions, I've found that I need to reduce the taper by one half and then subtract .001 to get my form setting.
Removing Enamel
Once the forms are set, I remove the enamel or bark from
the cane strips. I like to think of bamboo as having 4 layers- the outer
enamel, the inner enamel, the power fibers and the pith.
Final Planing
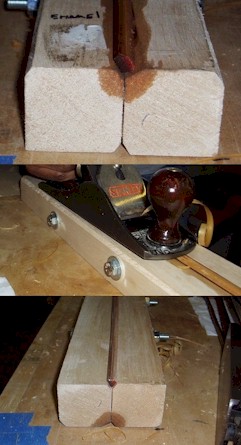
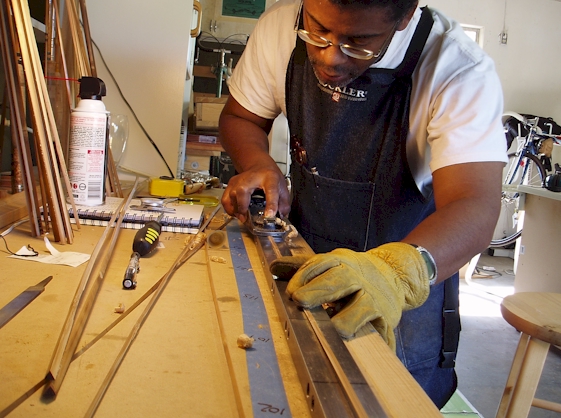
Final planing is when the 6 rough planed strip are given
the final taper. I wear gloves because the bamboo is razor sharp and can
quickly cut a deep gash if my hand brushes up against it. It's like a
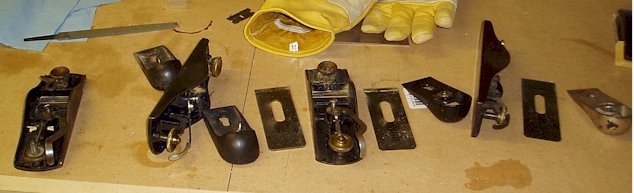
paper cut, only deeper and with lots of blood. I keep a file handy in case a node isn't completely flat and needs a little extra taken off the top. The hand plane is the rodmaker's bread and butter. Most folks swear by the Stanely 9 1/2 block plane and a lot of rodmakers don't or won't stray from the 9 1/2 because it is THE plane for bamboo rod making. There are a lot of other useful planes out there though. Some very almost identical to the 9 1/2.
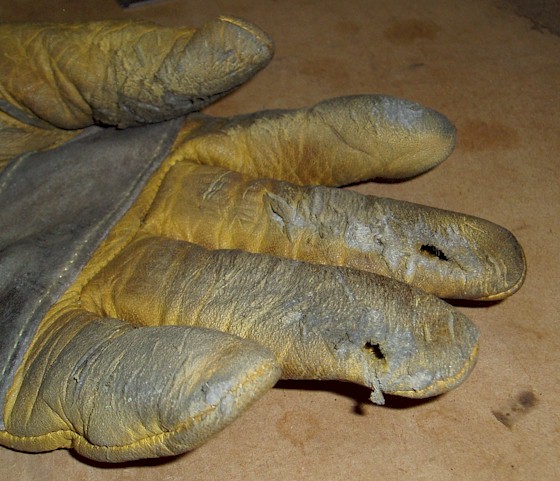
Cuts in the gloves caused by holding the bamboo. Gluing
I have several binders, a home made Garrison binder, a starndard Garrison binder (center picture) and a four string binder. The principles are the same regardless of style- to wrap the strips tightly with thread. The Garrison binder works with a single piece of the string. You wined the rod twice to get opposing wraps. A four string binder wraps the rod with four string at once. If done properly the blanks will come out nice and straight. If they don't, I try to straighten and remove any twists before hanging the blanks to dry.
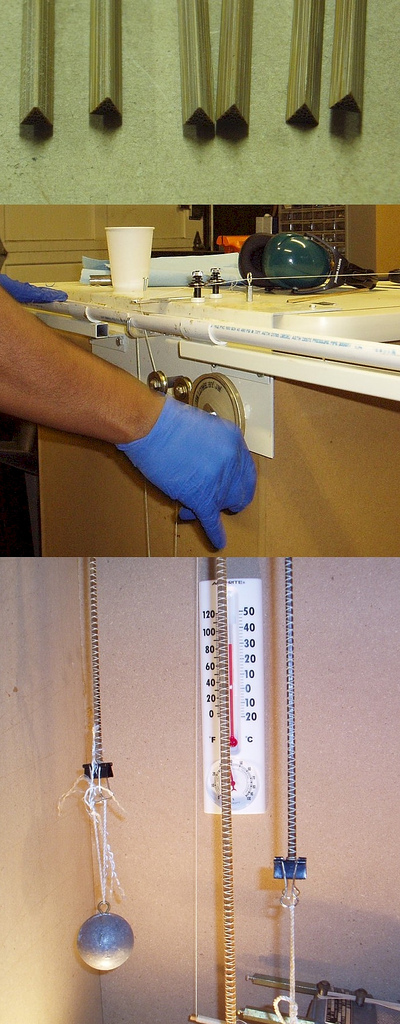
I use binder clips on both ends of the blank to ensure
that the rod hangs straight down. If you use string to hang the blank,
it tends to cant off slightly to one side and put a small curve in the
rod. Using the binder clips I can insure that each piece hangs straight
down. I find that adding a 1 pound weight also helps the blank to relax
and straighten when drying. In this case, the blank is hanging in my
drying cabinet which in winter will get as high as 90 degrees. Other
times during the year I simply hang the rod in the garage.
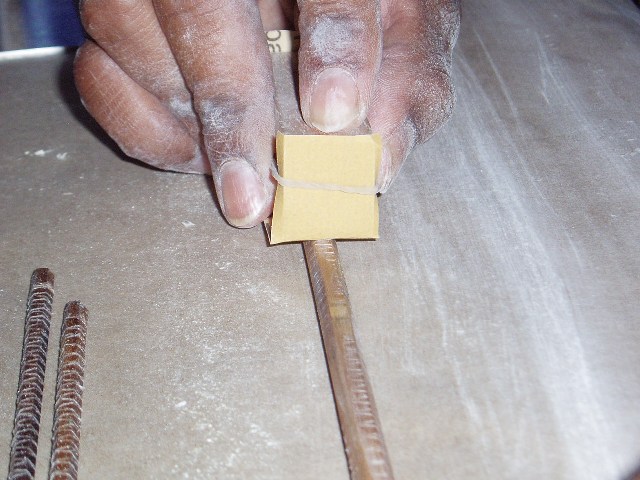
Sanding. Once the glued blank has cured, I remove the binding string and sand off the excess glue and inner layer of enamel. I use small blocks of hard wood as sanding blocks. I find that the runner kind tend to round off the corners of the rod. I have to change sand paper a lot but rod making is not a quick process. I'm in the home straight now. No need to rush.
I start with 240 grit sandpaper to take off the hardened glue. I do about 3 or 4 strokes down each flat and then switch to 400 grit sand paper. (In this picture I'm using 400 grit paper.) I’ll use the 400 grit until the surface starts to show just a hint of powerfibers. The powerfibers are the fibrous bundles underneath the enamel or bark and they are what give the rod its strength and resilience. I try to remove the enamel without sanding into the powerfibers. A rod with large powerfibers is evidence that the rod maker has sanded too deeply and negatively impacted the casting qualities of the rod.
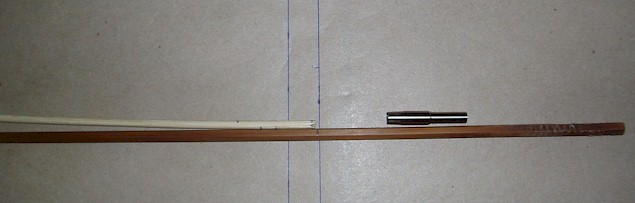
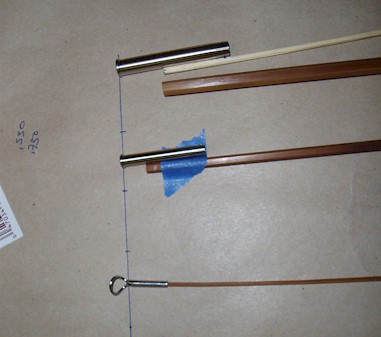
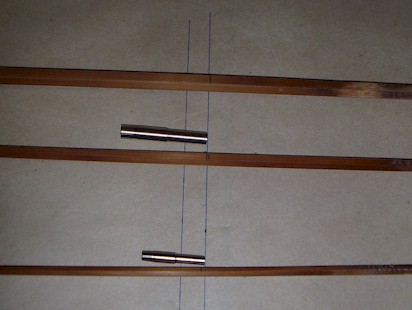
Once I have the raw blank, I need to cut to size I install the ferrules. In 2005 I wrote a good explanation of how I size the pieces for a rod. Since the rod I've been using to show the rod making process is a replacement piece, I don't have to go through the sizing process because I already know how long the piece needs to be. Therefore I'm going to reuse that write up here. Normally though, I have to figure out exactly how long each piece has to be so that I end up with a rod of the proper length. Sizing a blank can be a confusing processes for some folks. It's the sort of thing that gets more confusing the more you think about it. I like to keep it simple, the section length is simply the length of the blank in inches plus the amount the ferrules seat in inches divided by the number of sections. Sounds pretty easy doesn't it. I've come up with a little visual aid to ensure I don't miss cut the pieces. First, I layout some paper and mark two lines. For a 3pc 7 1/2 feet rod (which I'm using for this explanation on sizing), I simply divide the length in inches by the number of sections and mark two lines on the paper. In this case they are 30 inches apart. I then determine how much the ferrules will seat, in this case about an inch and a quarter and divide it by 3. That's the additional length the sections must be, so I make an additional line beyond the second. I then layout my rod and components. I like my rods to be slightly long on the tip and generally take my measurement from the bottom of the tip top eye. Using a small stick, I line up the ferrule next to its section. I line up the end of the ferrule with the second section length line.
I remove the ferrule from the stick and mark on the blank where the stick ends. I do the same with all pieces and voila, the rod is sized.
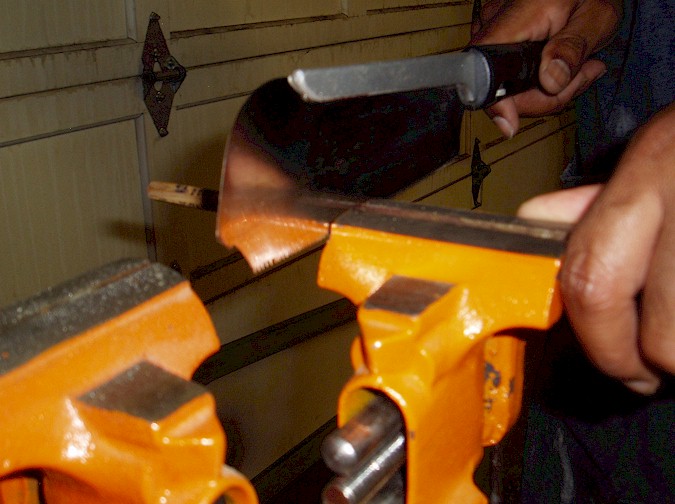
To make sure I keep the taper, I measure where the actual cut line is on the first section. Since I overlap the measurements on my sections 5 inches, I can make sure that the taper is continuous. If the first section is 30 1/4 inches, than I cut a quarter inch from the top of the second section. I measure the cut point on the second section and adjust the starting point on the 3rd section if necessary. I use a Japanese saw for cutting. These saws are great for small delicate work. This saw has been through the wringer. Fortunately, I can purchase replacement blades.
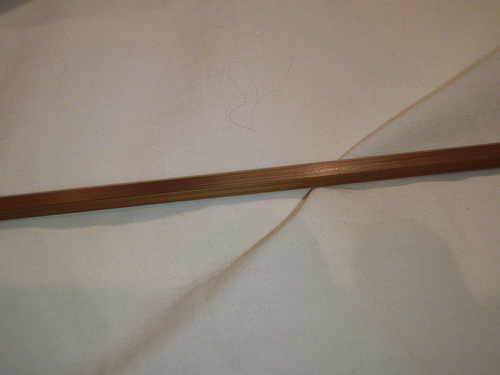
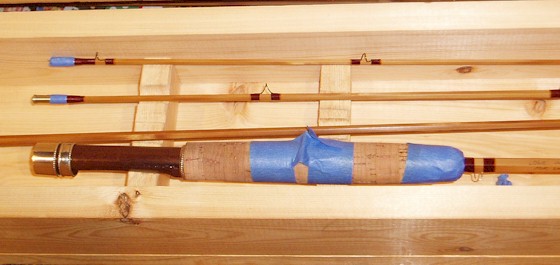
The ends of the cane are turned down to accept the ferrules and the ferrules are glued in place. For this I use golf shaft epoxy.
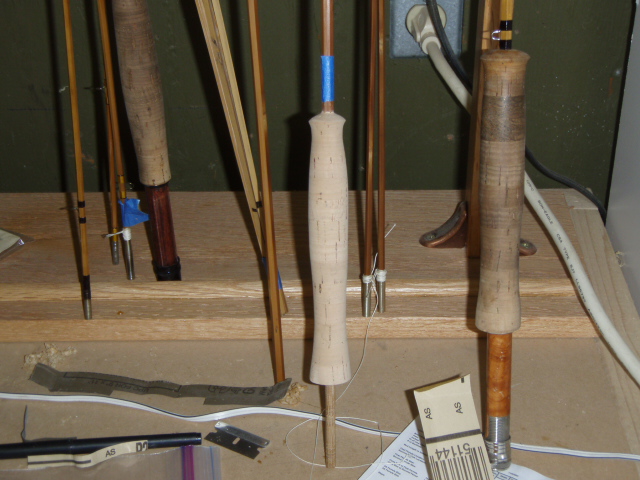
Creating the Grip I forgot to take pictures of this next step. Once the rod is ferruled, I'm ready to install the grip. I shape my grip on a wood lathe by first gluing individual cork rings to the blank. I use a water proof wood glue and a jig to keep the rings together until the glue dries. Once the glue dries, the rod is set up in the lathe and the gripped shaped with various grits of sand paper, starting with about 150 grit and ending with 1500.
A new grip doesn't stay clean long. Installing the reel seat Next I install the real seat. This is simple to do. I simply glue the hardware onto the reel seat one day and the next day I glue the seat to the rod. I use Two Ton epoxy which is incredibly strong.
The Signature
Before dipping the rod in varnish I sign the rod. Every
rod maker does things differently. One of my pet peeves is looking at
other rod makers work and not knowing how long the rod is, what line it
fishes and what the taper is. I think this last bit is important. If
it's not your taper I think it's important to signify that.
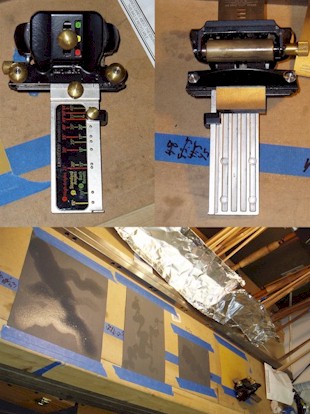
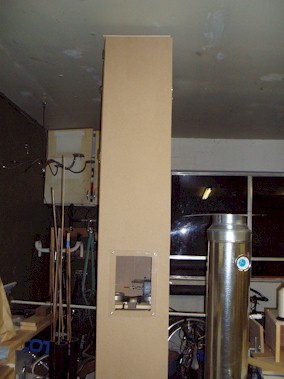
Applying Varnish I apply varnish to the rod by tipping the rod sections in a bath of Epifanes varnish, thinned 50%. The varnish is held in a copper tube and the tube is heated for two hours before varnishing. This is a picture of my dipping chamber. A copper tube is placed in the center and the rod is raised and lowered via a low rpm motor. There is a 100 watt light bulb at the base of the tube and two lights at the midway point in the chamber. The 3 lights allow the chamber to get as hot as 100 degrees in the summer with less about 30% humidity. In the rainy season the lights can bring the chamber up to 80 degrees with less than 50% humidity when the shop itself is in the 50s and 60s with over 80% humidity. Typically I dip the butts three times and the tips twice. I sand very lightly between coats. The rod will hang in the box for several days drying before I wrap the guides. Prepping and Installing the guides While the rod is drying I prep the guides. I use Snake Brand Guides. A lot of guys use these guides as is but I like to reduce the feet between 30% and 50%. The guides themselves are pretty flexible but longer feet mean longer wraps and long wraps mean a stiffer rod. I try to minimize the effect of the varnish, wraps and guides on the finished rod.
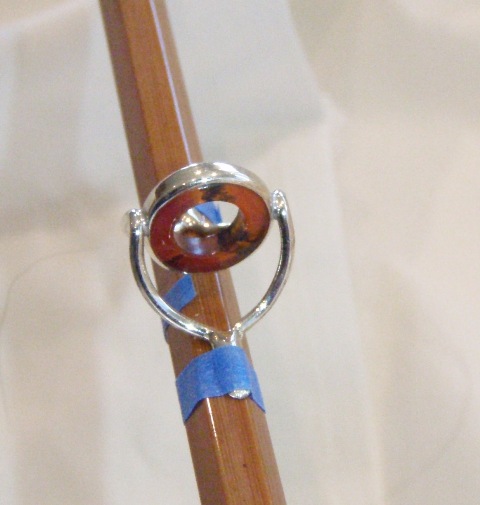
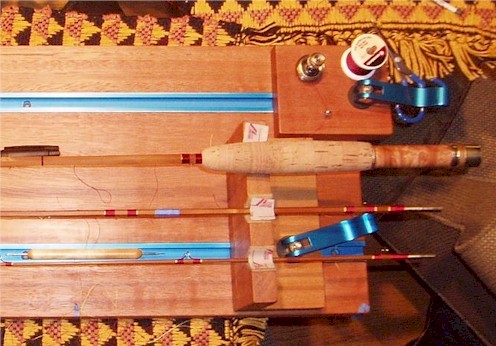
The Moment of Truth The moment of truth is the first time I cast the rod. I tape the guides to the rod using painters tape. The guide spacing is based on an algorithm I developed. I start by determining how many guides I want for the rod. I typically go with one guide per rod foot plus the stripping guide. I then place the penultimate a guide at about the 2/3rds place on the rod. All the guides will be spaced out between the first and the penultimate guide. I typically start the first guide at about 4 1/4 inches. This will probably change as I learn more about tip design. The algorithm will determine the location of the stripper but then I do something a little different than most. Some rod makers typically put the stripper at arms distance from the butt. The idea being that if the fly fisher drops the line, he/she can easily pick it up at the stripper. This never made sense to me. Why do everything else on the rod with an eye to rod performance and simply place the stripper for convenience? I mark the rod 3 inches above the stripper and 3 inches below and then take the rod down to the casting ponds and test cast it. I find that this can make a great difference in how the rod will feel in the hand and how well it will distance cast. I try to find that spot where the rod will throw a long line without feeling overloaded or sluggish. If I feel it needs it, I'll add a guide or two. I try to make sure that the guides are sitting on a break point in the rod, a section of the blank were the rod obviously changes in diameter. My guides start at 1/0 and usually progress to size 3 with a 10 or 12 stripper. Wrapping the Guides
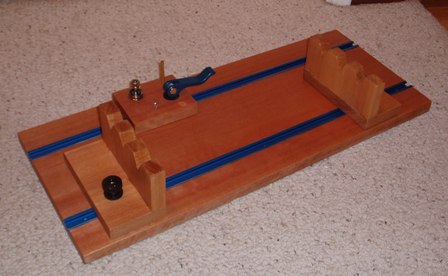
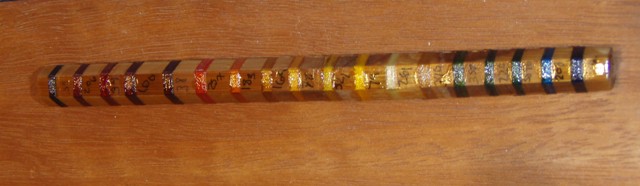
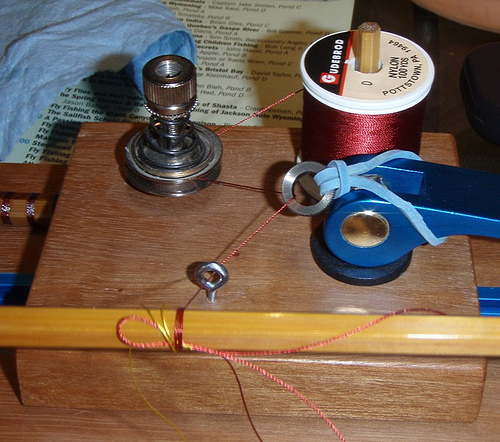
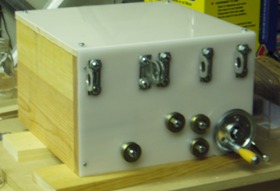
The guides are secured to the rod with thread and then covered with several layers of varnish. I use a home made rod wrapping jig to wrap each guide foot. The wrapper is made with lyptus and covered with a couple of coats of shellac. It's adjustable left and right which allows me to avoid having a guide in a rest. The right rest has a quick release lever similar to the one on the thread rest. The adjustable thread mount allows me to keep the rod perpendicular to the thread at all times. I wrap my rods with either silk or nylon thread depending on the color scheme I'm trying to achieve. The varnish I use to coat the wraps darkens the threads slightly. Other varnishes can make them transparent. I use a piece of cane with several different coated wraps to help me determine the colors I want to use. Each thread wrap has the number of the spool from which it came written underneath it.
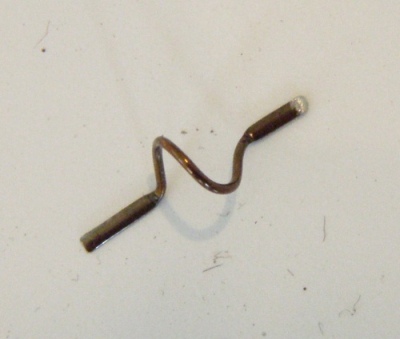
The wrapping Jig works by mounting the thread on the post of the thread rest. The thread passes around a thread tensioa small ring attached to a rubber band, through a screw eye to the rod. A simple rubber band provides constant tension so that when I let go of the rod, the thread does not sag or unwrap. In this picture, I'm wrapping with burgundy nylon thread with yellow silk tipping.
To be continued.
.
|
|
| Rods 11F and 12F are almost ready to wrap. I've installed the handle cork on 11 and am waiting for it to dry and I've installed a pre-fab grip on rod 12. Both rods are ferruled. The down side of making 4 rods at once is that I don't have enough drying space. Rod 10 is sitting in the drying box, ready to be dipped but I can't fit 11 and 12. | |
|
|
|
|
I won't get much done this weekend but hopefully by this
time next week I'll have rod 10 dipped and rods 11 and 12 wrapped. I
really want to finish 12 so I can send it to my brother-in-law. 9 and 11
are mine. Since 9 is a "blem" for lack of a better word, I'll probably
fish it once this year to give it a test and then send it off to my
parents so I have a cane rod to fish with when I'm there.
|
|
|
1/19/06
I’ve been real eager to start dipping but haven’t done so because my shop is pretty dusty. The plan is to blow the dust around in the shop and then turn my shop filter on high and scoop it all up. Well, last night I noticed that the dip tube had some saw dust in it and I tried to clean it out using denatured alcohol. Big mistake, the tube cracked right down the center. I called Tap Plastics up to ask if the same thing would happen with varnish and they said that over time it’s pretty likely. I’m glad I discovered this now.
The guy said that I might give polycarbonate a try but for the cost I might as well use copper piping. I had originally planned to use copper but it at $45.00 for 4 feet it seemed cost prohibitive. Well, If I end up going with the polycarbonate, I will have spent $54.00 on plastic with no guarantee of having problems in the future.
On the up side, I scraped rod number 11 (AKA JL3-11F- 7642 or 11F) last night. It came out pretty good except that the butts are still coming out too big. The further down the butt you go, the more it’s off. I don’t quite understand it. Most of the stations are ok but the last 3 are .006 off. I can take .002 of each side and not be too concerned but I’d rather not. I need to figure out what’s going on. It’s got to be the glue. 01/17/06 I got a bit done this weekend. I finished the dip tube. I’m pretty happy with the way it came out. I need to get a light for the bottom portion and maybe install some latches for the door.
|
|
|
|
|
|
|
|
|
I also put a second coat of Varathane 900 on rod #10 (AKA: JL3-10E-7643). I much prefer the V900 on the wraps. On the other rod (JL3-9E-7643) I put a first wrap of V900 and a second wrap of diluted Epifanes. The first coat of V900 didn’t saturate all the fibers and when I put on the coat of Epifanes, the wraps darkened a bit. The Epifanes also gives it a hard, crusty look. It’s a good rod finish but not a good wrap finish. It’ll be interesting to see what happens when I dip the rod.
I picked up a new shop vac at Home Depot. The shop vac I have is ok but it doesn’t have a HEPA filter and all the fine rod and wood dust kept getting blown back into the air. It’s everywhere.
The new vac has a 6.5HP engine and is a vac and blower. It’s much more powerful than my old 1.5HP vac and Home Depot has the HEPA filters readily available.
01/13/06 Well, I haven't done any work this week. My parents came for an extended visit and I spent as much time with them as possible. My Dad might normally hang out in the shop with me but in winter the shop's too cold for that. This weekend is a 3 day weekend and I should get a lot done. The ISE show has come to town. Last year was a dud but this year was a bit better. Chuck and Larry were there with their High Sierra Rod Company. Business is good and the rods seem popular. I cast their most popular model the Brookie. It was a nice rod. It roll cast well and was very nice at short distances, which is what it is developed for. I also cast the Tournament model which was a taper that Larry's dad came up with. Larry is a second generation rod maker. 01/08/06 I've finished wrapping the 2nd 3pc rod and have started to make the dipping tube. I should have a workable tube by Tuesday or Wednesday night. 01/02/06 I glued the two piece rods up on Saturday. Everything went pretty well. I'll scrape them tomorrow. I've finished the wraps on the first 3pc rod. I've given the wraps a thin coat of varathane 900 to act as a sealer/color preserver. I'll probably start on the dipping chamber later in the week. I need to go down to Tap Plastics to see if I can get a clear plastic tube. Here's rod 9 sitting on the wrapper before I put a coat of finish on the wraps.
|
|


